Let’s design spooky ghosts or flying bats with the help of a pencil eraser and paint. It is super easy and fun.
Give it a try and create your own Halloween Pencil Eraser Stamp Art with your kids.
Let’s dive right in.
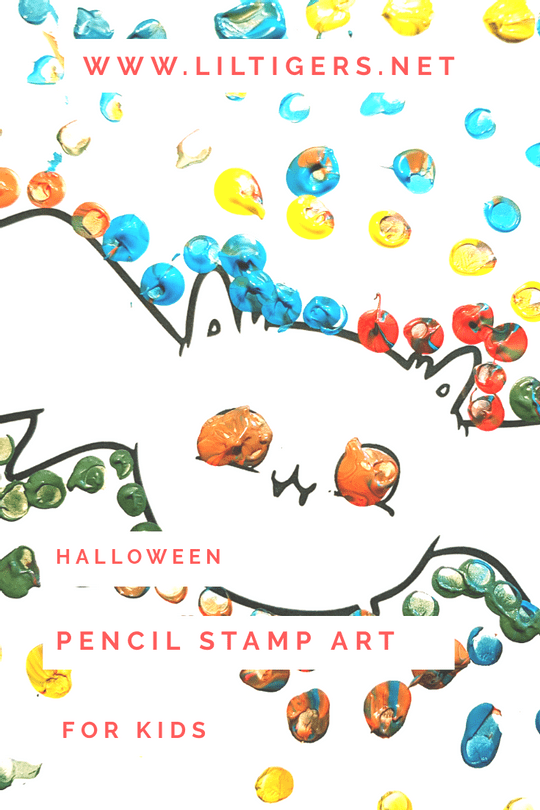

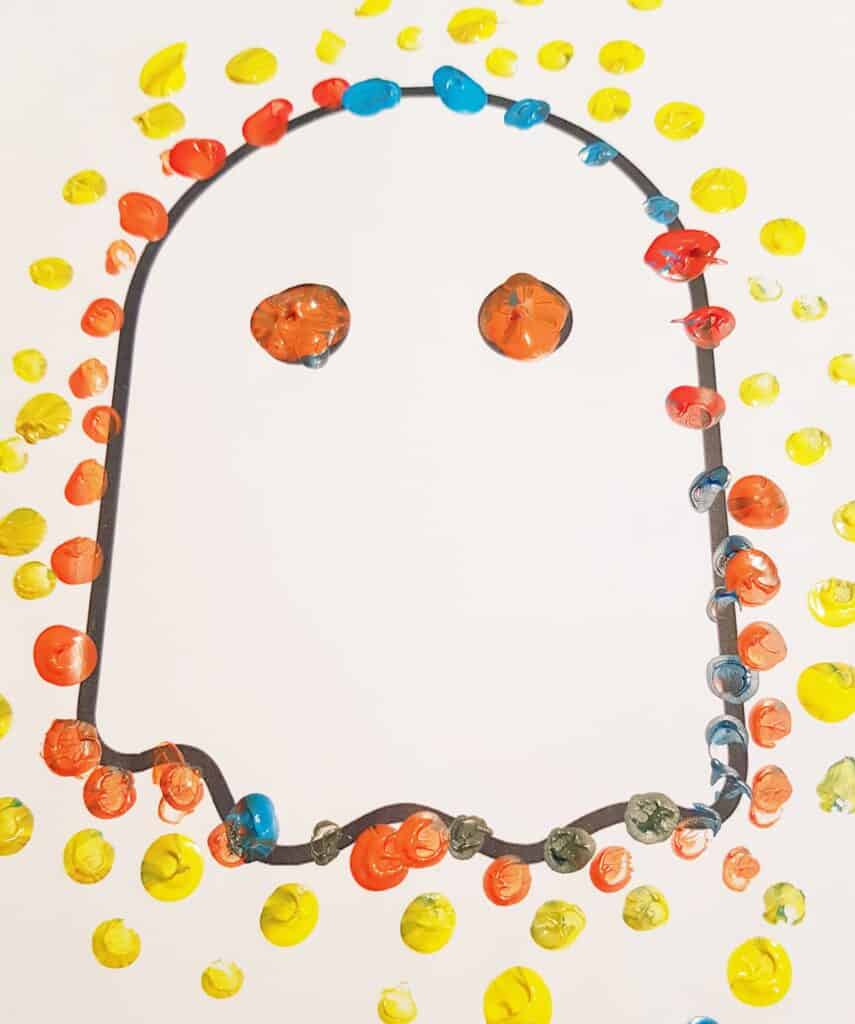
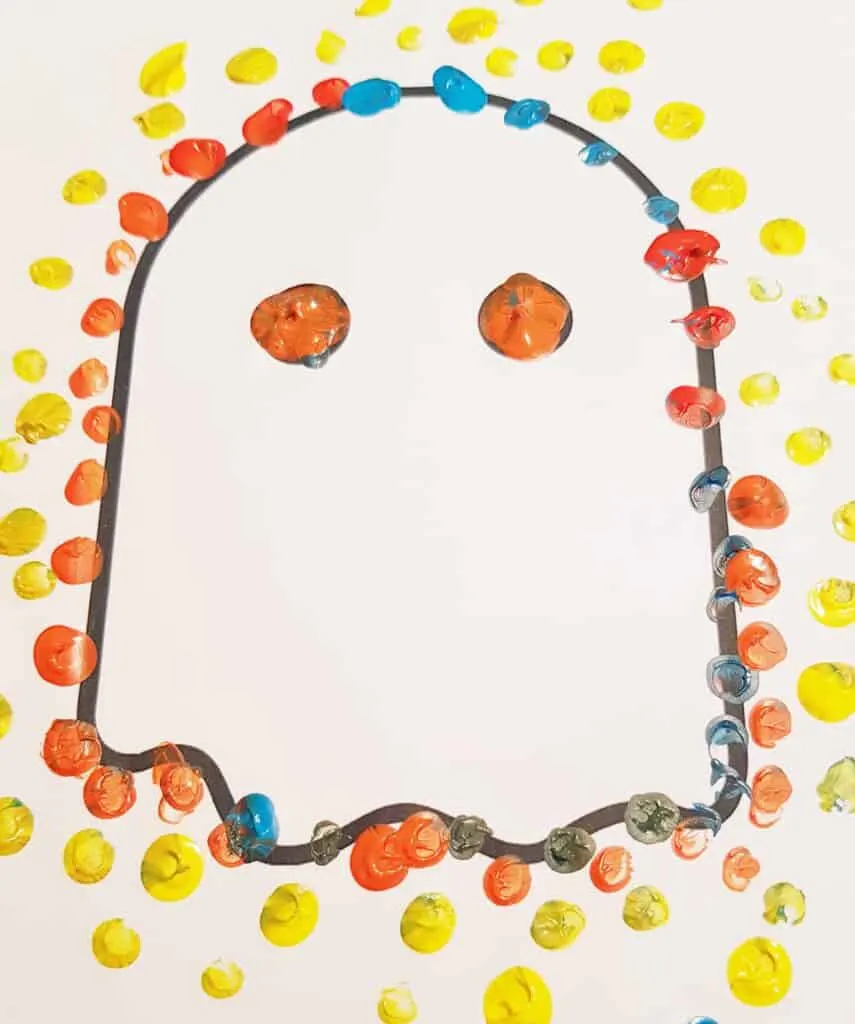
Ghost Pencil Eraser Stamp Art
Halloween is one of my children’s favorite holidays, of course after their birthdays and Christmas.
Since a lot of autumn days are miserable and cold in Germany we love to do fun craft projects on rainy afternoons.
Mostly they are either educational, season, or holiday-related. Since I have three kids in the house at the age of 2,4 and 7 they also must be toddlers which is still interesting for big kids.
Wait, we have more Halloween activities. Go check out our No Carve Pumpkin Decorating Ideas, Free Printable Thanksgiving Scavenger Hunt, or great Halloween Party Ideas.
As long as your child doesn’t try to take the pencil in his mouth you are good to go for this easy ghost craft. Any liquid colors can be used or even an ink pad will work.
If you are worried about little toddlers use eatable colors or make your own finger paint. Nevertheless, please supervise younger children during this activity since the erasers can be a choking hazard.
But let’s get started now and see what we will need for our DIY Halloween pencil eraser stamping art project.
Pencil Eraser Stamping Materials
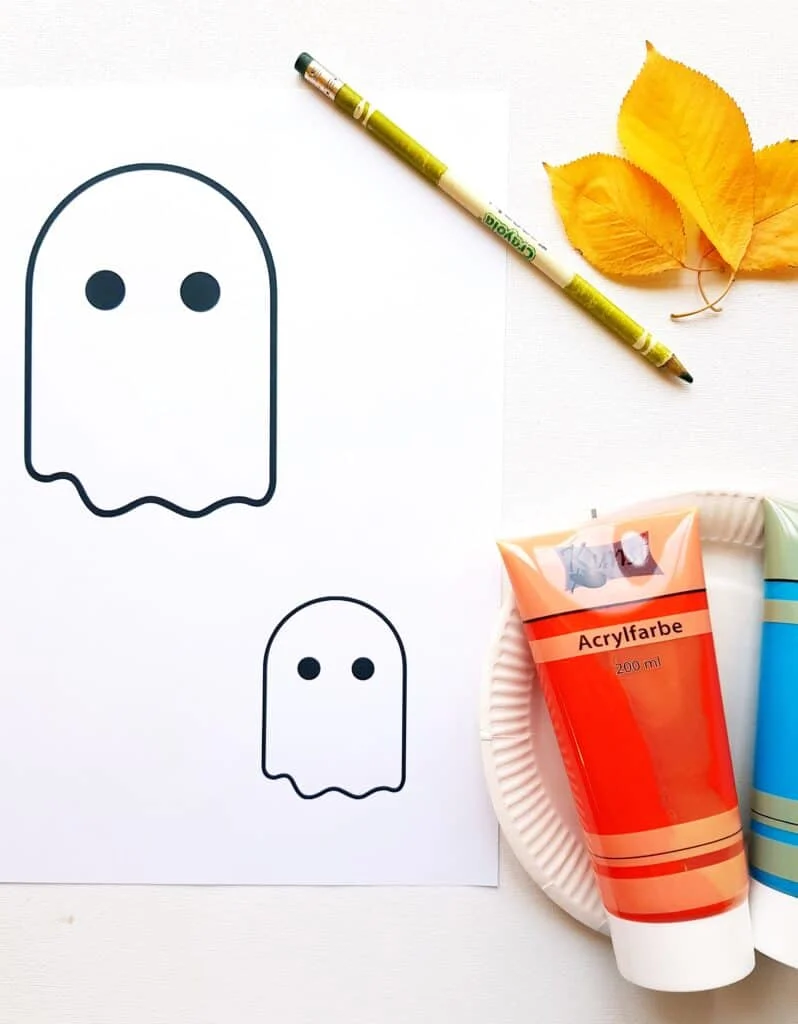
- pencil with a flat eraser
- free printable pencil Halloween drawing templates (found below)
- paint
- paper plate
- marker (optional)

Pencil Stamping Instructions
These step-by-step instructions are here to help you visualize how to make this fun Halloween ghost activity.
Please scroll down to simply print out the instructions!
Step 1: Plan your project
What do you like to create? Will you do freestyle, draw your own object outlines, or get a free printable?
Set up your mind and prepare your materials in step 2 accordingly.
Step 2: Set up your eraser stamp idea materials
After choosing your design it’s time to prepare your Halloween project.
Either print your free template, draw something with a pencil yourself, or let your kids do it when they are old enough.
Then place your liquid colors on a paper plate for your children. We used darker colors such as orange, green, and purple to match our Halloween theme.
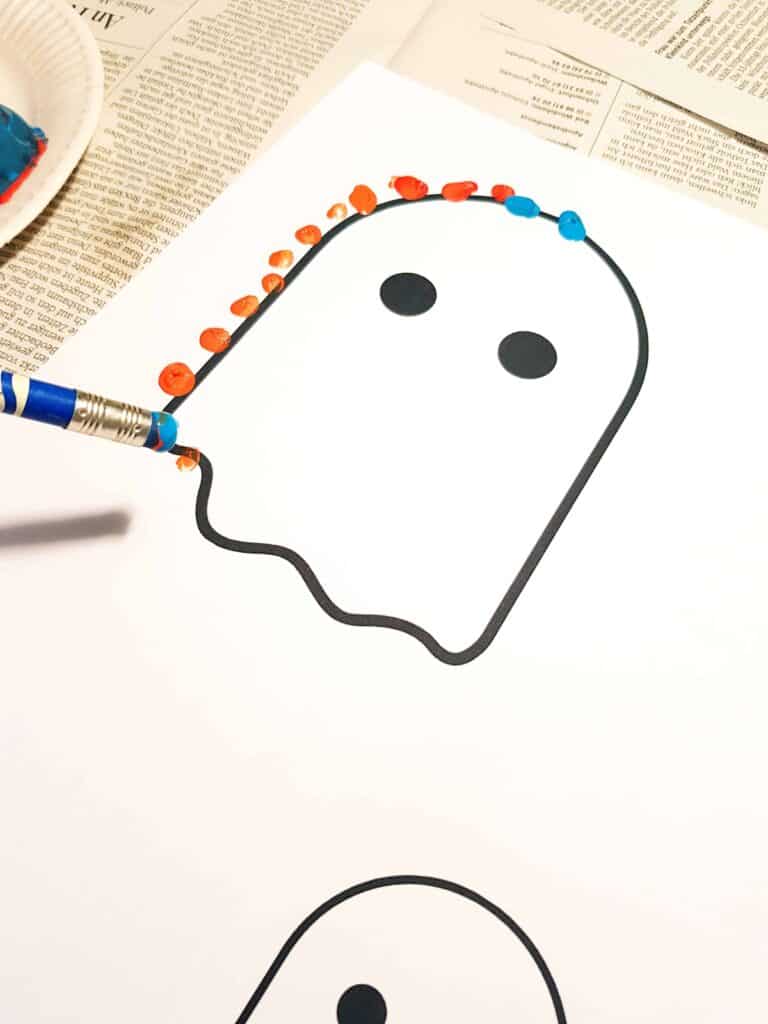
Step 3: Let’s have fun
The next step is the stamping process. Use the flat eraser side of your pencil as a stamp.
Dip it in your liquid color and stamp it away. We started by going around the outlines and moved our way slowly to the edge of the paper.

Step 4: Draw faces (optional)
Use a black marker to add faces to your ghosts and sign your art project like a real artist.
Don’t forget to add the date in case you like to keep it as a memory in your arts and crafts folder.
If you are a visual learner, go check out his pencil eraser stamping art tutorial to help you visualize our easy Halloween activity.
Are you interested in more DIY Kids Activities, Arts & Crafts, and Easy Science Experiments?
Subscribe to our newsletter now and never miss an update on new ideas for kids or free printables!
Click here
Pencil Eraser Stamp Art Tips
- Be aware that this ghost project for toddlers can be messy. Most likely their arms or elbows will end up at some point dipped in paint. Simply use washable paint or put them in old clothes to avoid turning this fun art project for kids into mom stress.
- Did you make your own eatable liquid color yet? It is super easy and would be perfect for this activity. We tried it several weeks ago for another project and I have to admit my kids loved being mommy’s little helper in creating their own paint. Here is the recipe we used.
- Add a twist and go to the library prior, get some fun Halloween books, or watch a Halloween movie prior to your project to engage the kid’s creativity.
- This easy pencil eraser stamping art project for classroom settings. We did it together with my son’s friends, they all loved it and it was super easy for me to coordinate multiple children and a small toddler at the same time!
- Why not make your own toddler-safe paint? Try this fun recipe here.
Summary of Pencil Eraser Stamping Art
My kids loved this eraser stamp project. I can highly recommend it.
We had already all the materials in my house, it was super easy and fast to set up and not a big mess at all. Which makes it definitely a mommy win.
The kids on the other side were excited about this creative project which kept them engaged the whole afternoon. No one was bored and even my small toddler could easily participate!
How to Download Your Free Printable Pencil Halloween Drawing Pdf
Simply sign up here for our newsletter and you will receive the link to our pencil Halloween drawing template pdf.
Already a subscriber? Don’t worry, no need to subscribe twice. I just updated our free printable library. You can find our easy pencil Halloween drawing printables there or check our latest newsletter for more information.
If you have any questions, please do not hesitate to reach out to me. I m happy to help!
Now I would like to hear from you!
How did you enjoy this cool ghost craft idea?
Either way, let me know by leaving a comment below right now.
I’d love to hear from you!
Pin This Ghost Craft for Kids
Don’t forget to save this easy ghost craft for preschoolers on Pinterest for later! Be sure you are following along with Lil Tigers.
Halloween Pencil Stamp Art
How to stamp spooky Halloween pictures with kids.
Materials
- Free Printable or blank paper
- pencil with eraser
- watercolors
Instructions
- Print your free Halloween templets
- Use your eraser on the back of your pencil and dip it in liquid colors.
- Use the colored eraser tip as stamp and paint your picture with it.